What you will need.
Plunge Router + guide.
5/16" parallel router bit.
1/2" parallel router bit.
Water Proof 24 Led Strip - Red 12V 8mm wide x 240mm long.
I'd reccomend you use these CLICKY as they are waterproof and have a flat face which makes them easy to attach to the acrylic, they also come with 6 ft of cable attached.
Note: It seems that the ones in stock at the moment only have 3 ft (1 metre) of cable, which will need to be extended, any light 2 core cable will do for this as the current drawn by the LED's is very low.
Cost is £10.35 + p&p
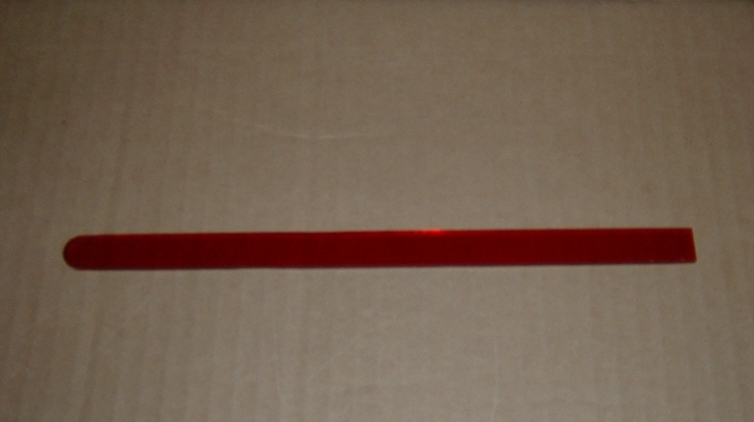
3mm thick Red Tinted acrylic.
I got an A4 sized sheet cut into 13mm x 297mm strips from www.plasticonline.co.uk
Also available from this eBay seller CLICKY (same company as above) for £1.30 + £1.50 p&p and they will give you 4 cuts for free
Superglue.
Silicon sealer one that dries translucent or clear.
2" (50mm) masking tape.
Marking out.
1. If you look closely at the rear edge of the spoiler you can see the seam where the 2 halves join. It's obvious in this picture of an old spoiler that was split and I used for the prototype.
If you can't see the seam, then measure the thickness of the spoiler and work out where the centre of the spoiler is.
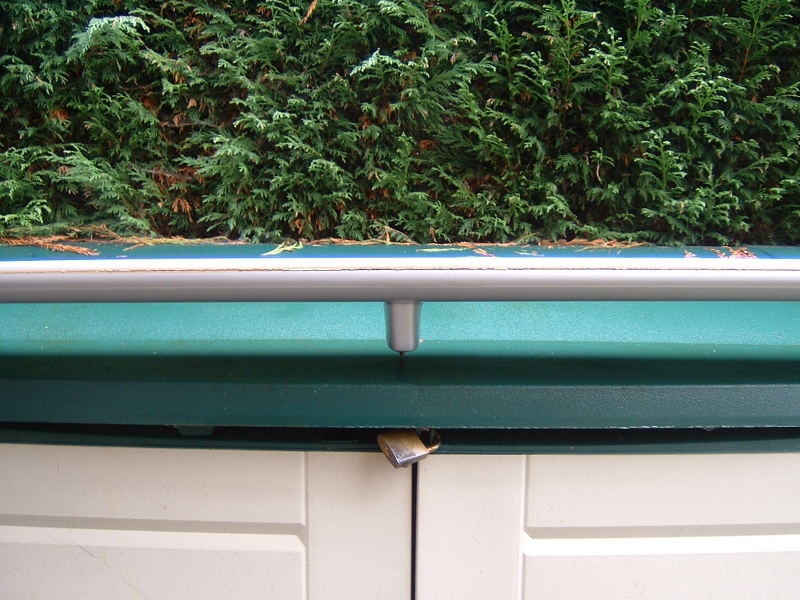
Take a note of the distance from the top of the spoiler to the seam.
2. Tape across the centre section (top and rear) of the spoiler with 2" masking tape, then mark the position of the seam and the centre (side to side) of the spoiler.
3. Mark out the slot you will be cutting, the LED's are 240mm long, the slot will need to be slightly longer as it will have rounded ends, allow about 2mm extra either end.
4. Secure the spoiler so it is sitting at it's normal angle as it would be on the car, I clamped the spoiler it in a workmate bench to secure it while routing out the slot. You don't want it to move while you are using the router !!
The following pictures will let you see how to clamp the spoiler and position the router.
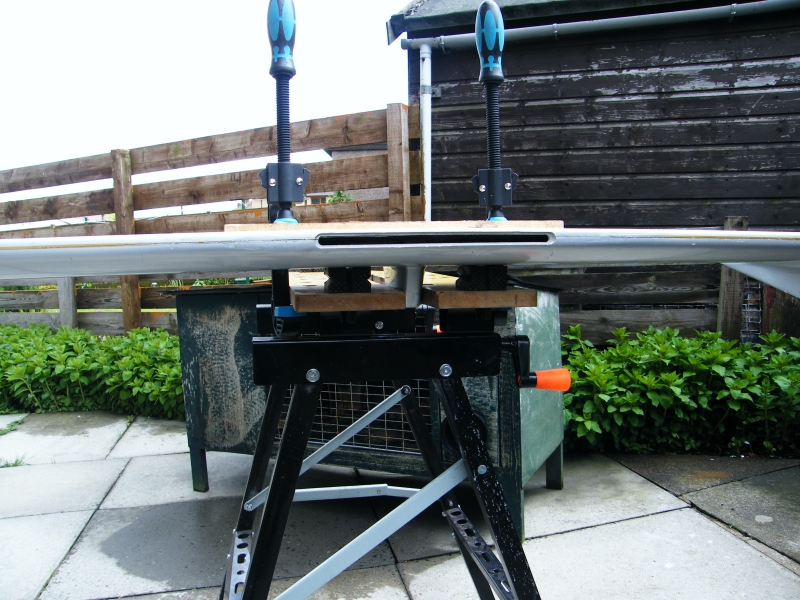
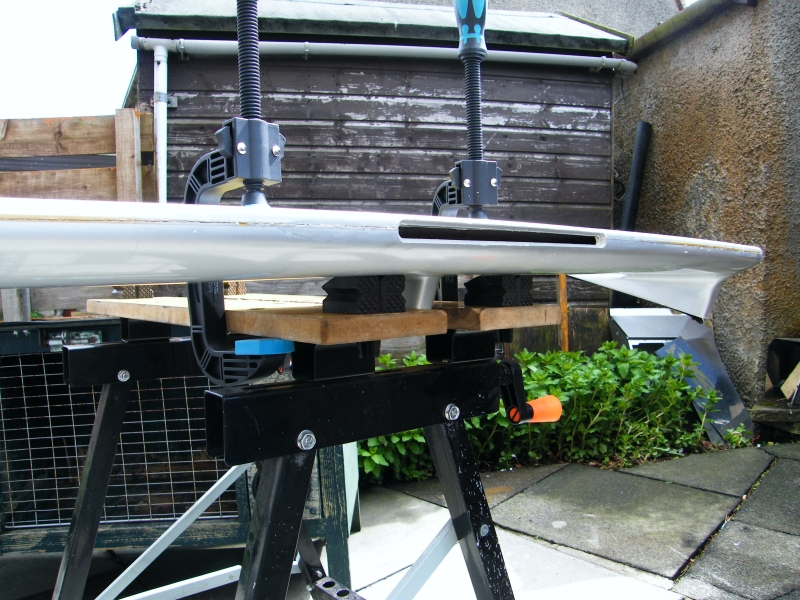

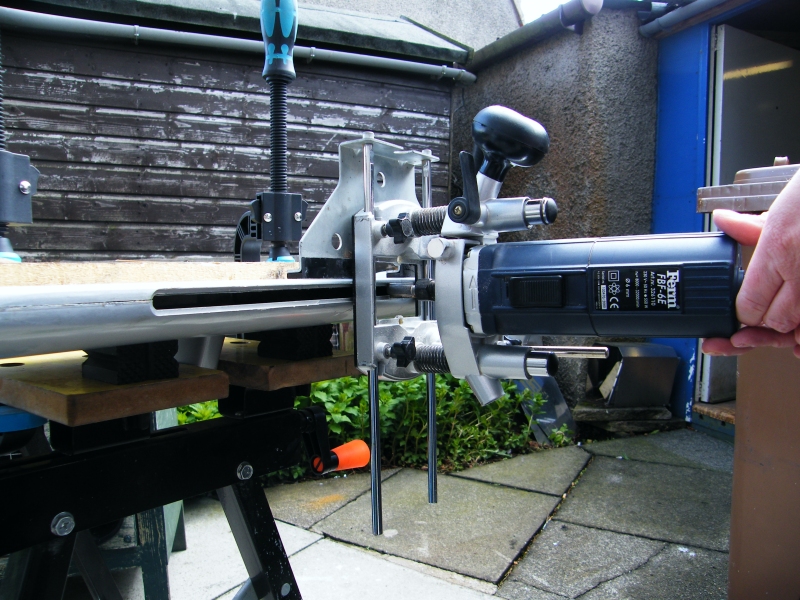
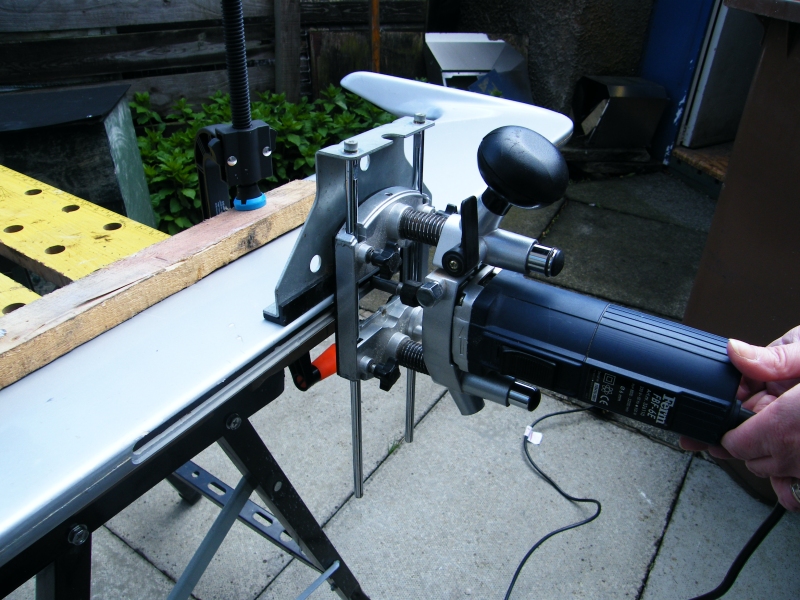
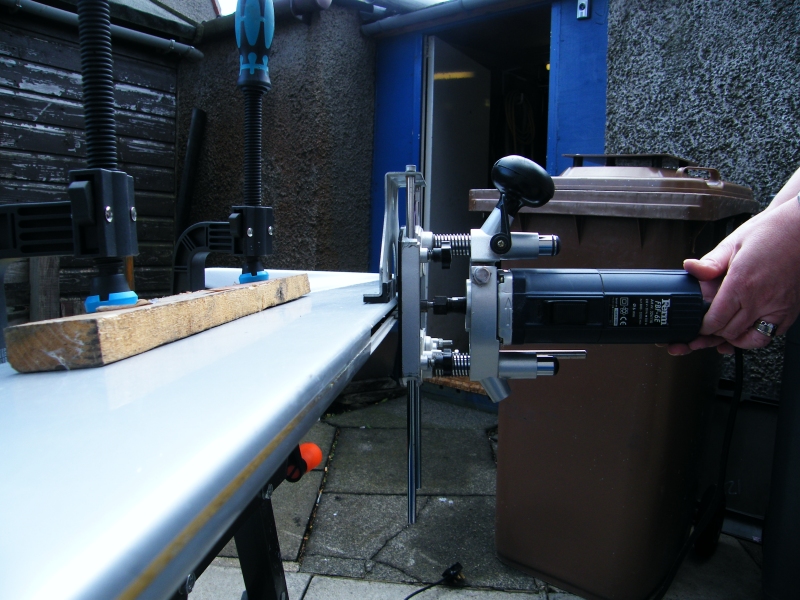
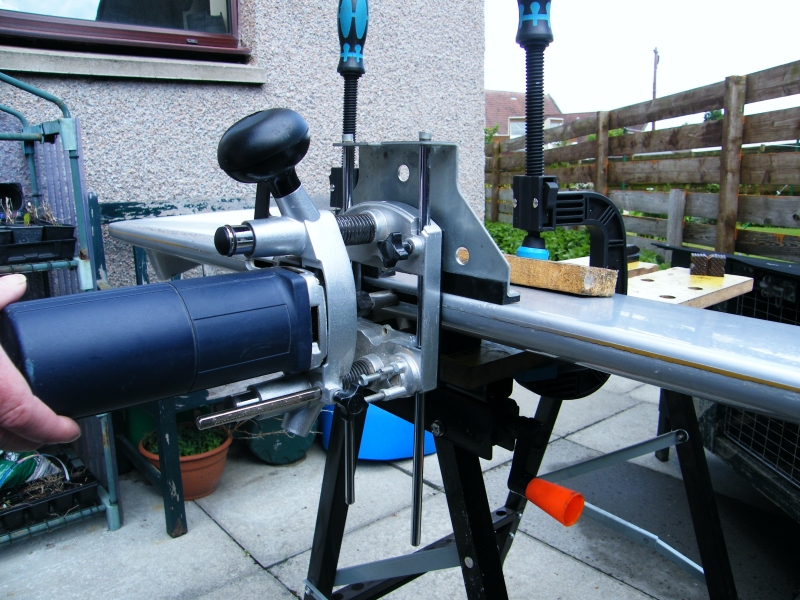
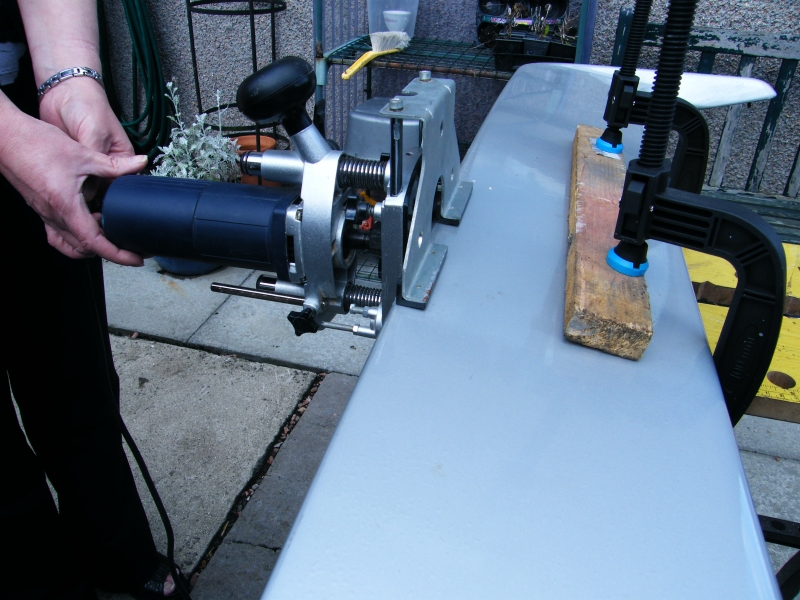
Caution: Do not tighten the clamps or workmate too tight, the spoiler is hollow and you may damage it. Protect all the areas where you are clamping it with masking tape and soft cloth, this will help prevent any paint damage, especially if your router doesn't have a softer plastic sole plate.
While cutting you may want to employ an assistant to help steady the spoiler and prevent it moving
Router setup
NOTE: Before starting to cut the spoiler I would have a good practise on some scrap material (wood) to get the hang of it. Read this article several times until your sure of what you are doing .
Once you start cutting there's no going back .
SAFETY FIRST
I'd advise the use of goggles and a dustmask while using the router, the spoiler is fibreglass and a lot of dust will be created, if you can hook up a vacuum cleaner to your router to help with dust extraction then do so.
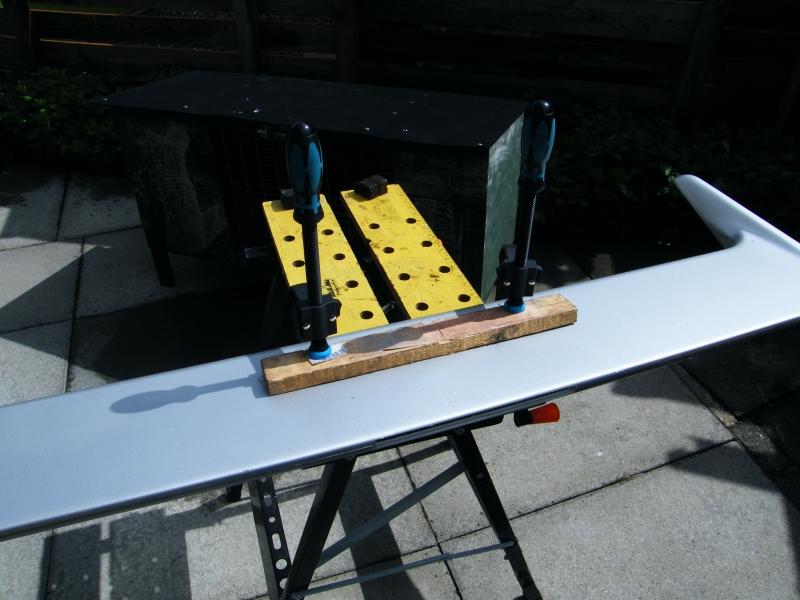
5. With the 5/16 bit in the router set the guide so that with the guide on top of the spoiler and the router hanging vertically the centre of the bit is on the seam. lock the guide in this position and don't change it.
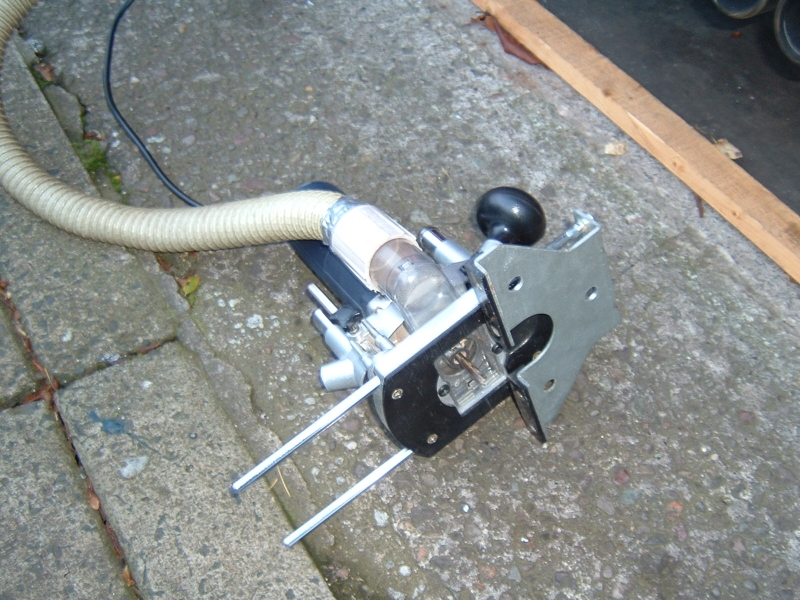
6. Cut the slot you have marked, don't try to cut the full depth in one cut. Do one cut about 1/8" deep then repeat with a 1/4" deep cut, this should take you through the skin of the spoiler. I would suggest you set the depth stop on the router to the depth of cut you are making, position the router before starting, then slowly plunge it to the stop. Try to keep the router vertical as you make the cut, switch off the router and let it stop before removing it from the cut, it's all to easy to catch the edge if you remove it running.
7. Change the router bit to the 1/2" bit, set the depth of cut to allow the acrylic to sit flush with the surface of the spoiler, it's around 3mm but check yours. Now make a cut over the existing slot, this will allow the acrylic to sit into a recess and be flush with the surface of the spoiler. The difference between the 2 router bits is 3/16" that gives you a 3/32" lip on either side of the slot, you will need to run the router past the end of the slot to maintain this lip all the way round. Again be very careful to maintain the router vertically and switch off and allow to stop before removing.
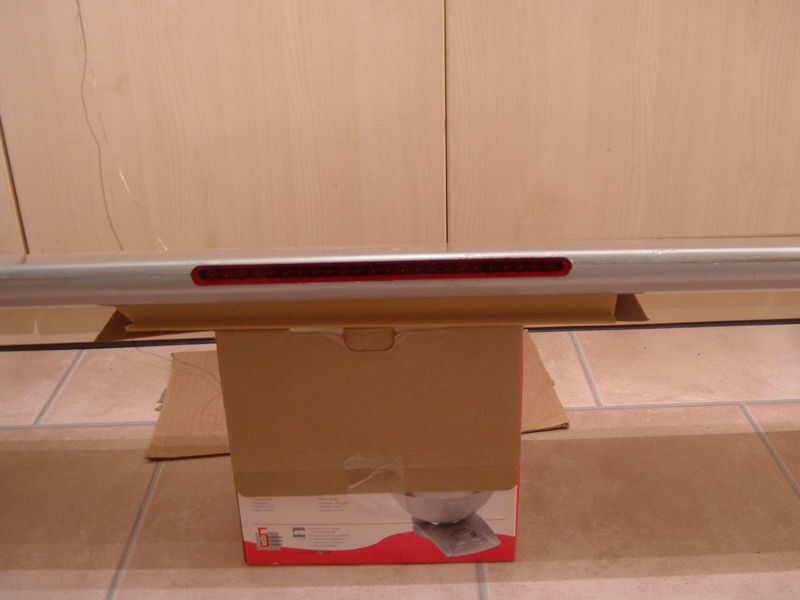
You should end up with this
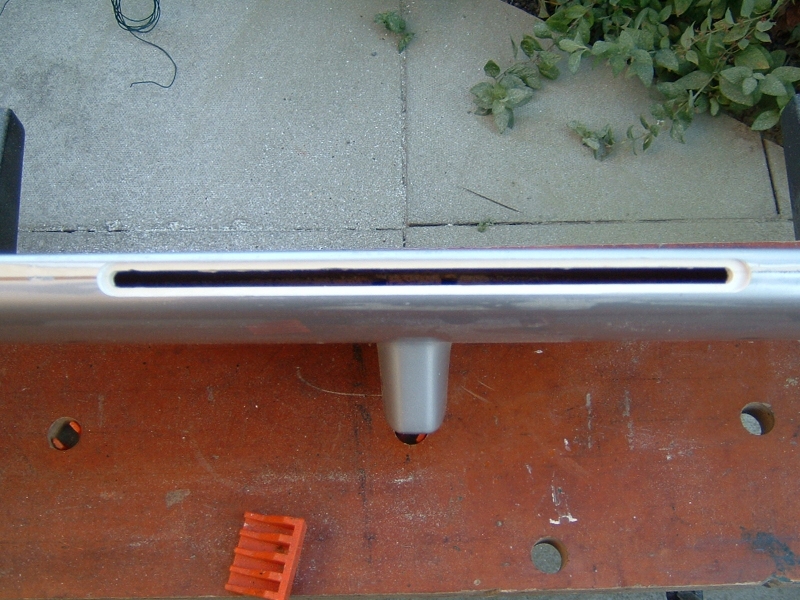
That's the hard bit done.
Assembling the LED's
8. Cut the acrylic to the correct length for your slot and round the ends with a smooth file to match the curve left by the router, take your time and get it right, it will stick out like a sore thumb if it doesn't match. This is a piece of acrylic with one end completed
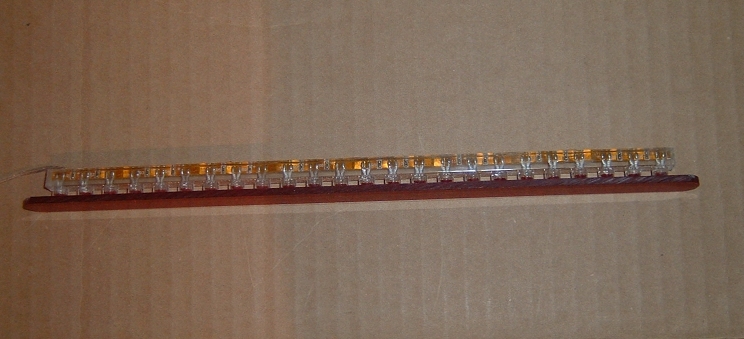
9. Clamp the LED strip between 2 strips of wood (to keep it straight) so the top surface of the LED's is slightly proud of the wood. Put a small spot of superglue on the centre of each LED then carefully position the acrylic strip so that it is central (in both directions) on the LED strip maintain gentle pressure on it until the glue sets. You should end up with this.
10. Feed the cable for the LED's down the centre leg of the spoiler ( a bit of stiff wire is handy here), there's already hole in the spoiler leg for it, you may need to make a hole on the rubber seal to pass the wire through.
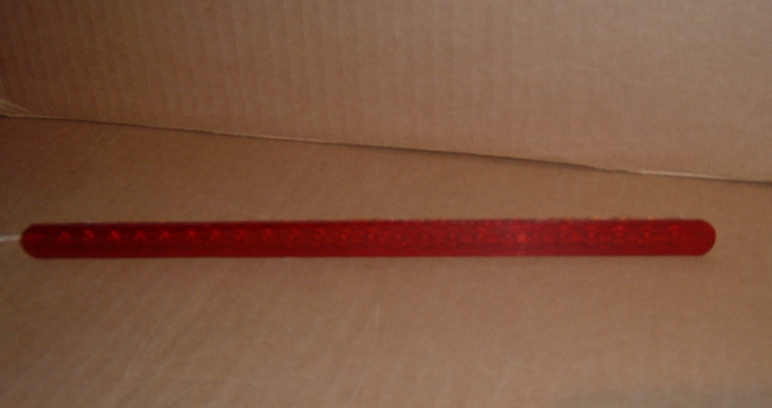
and illuminated

11. Run a small bead of silicon round the lip of the slot you have machined and pop the acrylic/LED strip into the slot secure with some tape and leave to set.
NOTE: If your repainting the spoiler do it before finally securing the acrylic in. If your not painting it I would suggest you paint round the slot you have made with some touch up paint same colour as the spoiler, it will look much better if you do.
12. With the spoiler refitted to the car run the cable down behind the boot lid stiffening struts to the left hand side then in behind the trim panel, leave some slack to allow for the boot opening and closing.
13. Find the cruise control connector, refer to my article on unused cruise wiring for this, CLICKY , on it you will find a White/Black( pin 13) which is a chassis earth and a Green/White (pin 15) which +12v from the brake lights. Connect your LED's up to these points by either cutting and joining the cables or using flat pin crimps like these
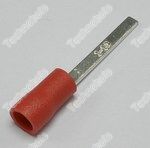
which will plug straight into the connector.
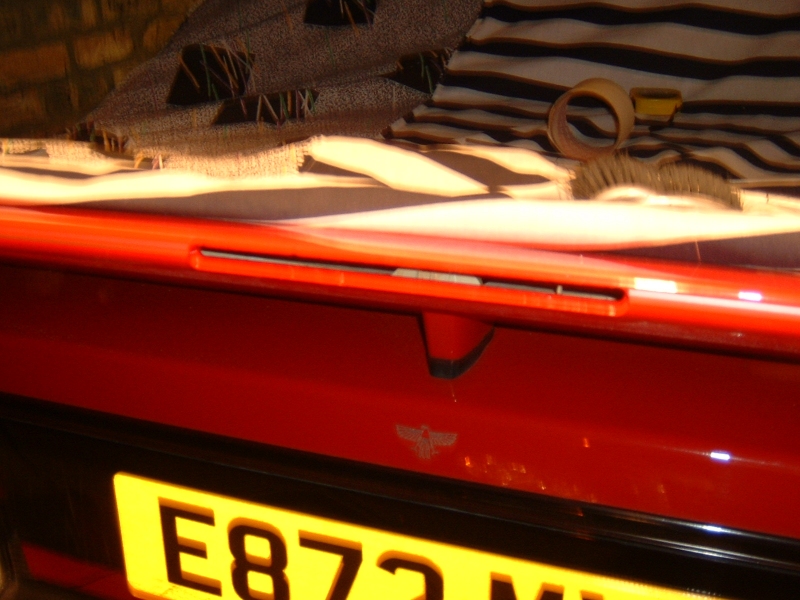
Good luck and enjoy the finished spoiler brake LED brake light.
Jimi
May 2009
Copyright © by Jimi Lawson All Right Reserved.